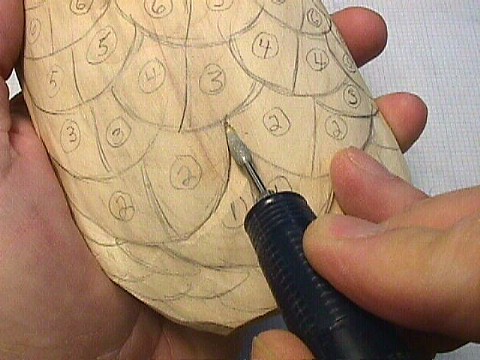
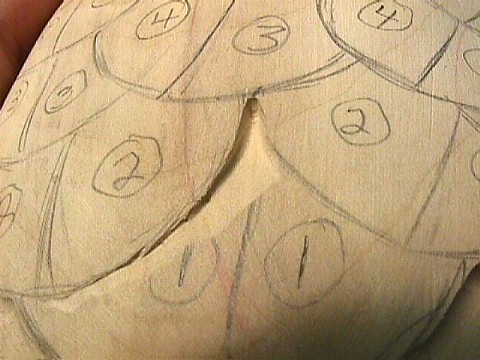
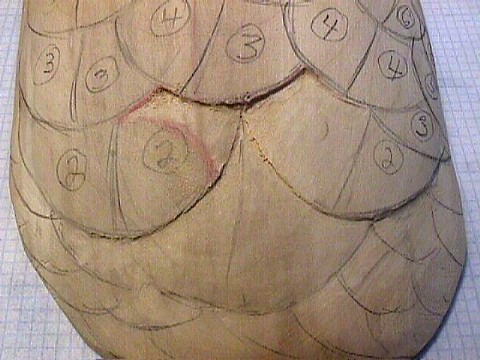
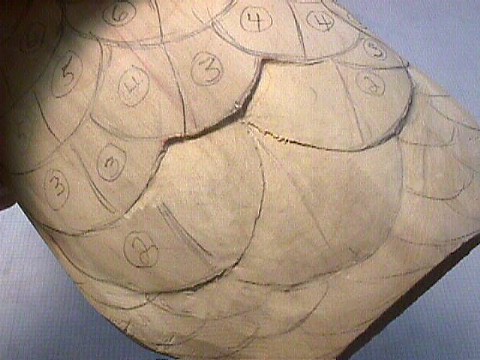
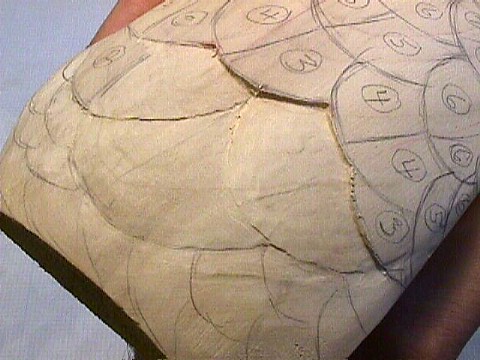
In any feather group of any bird, we find that feathers lie upon each other like roof shingles. They should be carved just like roof shingles are applied. This means we start with the under-most feather first and work each subsequent level from back to front of the group. The type of feathers we will be carving in this demo are contour feathers, protective feathers that contour to the shape of the avian body or appendage. Each feather is strongly cupped so as to cling tightly to the feathers underneath it. This shape must be depicted as they are relieved from the wood surface. Each feather must also flow from its point of origin in the group in order to appear realistic. See in image 22, the numbers penciled in on the feathers. The numbers indicate the sequence in which we will carve. This will make much more sense as you follow the demonstration posted here.
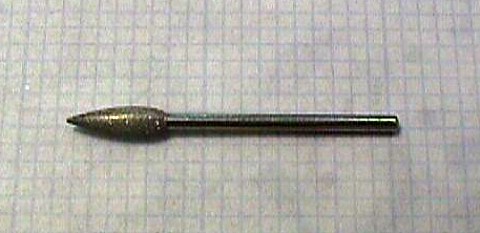
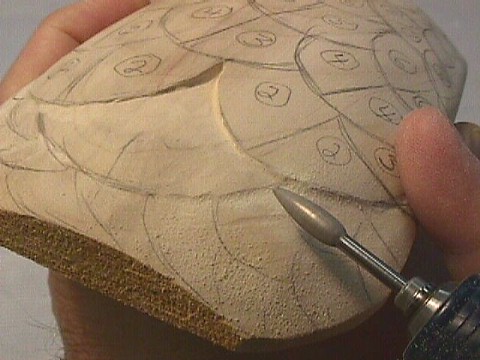
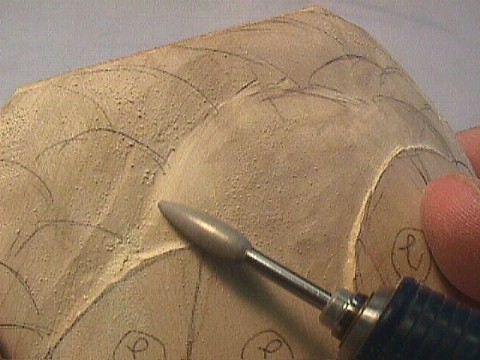
Use the "Brunet Flame" diamond bit as shown here and available from Jaymes Company.
Use the side of the bit to ease down the steps. Blend this beveling softly into the rest of the convex feather.
This image illustrates a well shaped first feather Redraw the quill center to show its point of origin
I turn the feather upside down, bringing down the step I created by carving the feather below it.
Here I have finished shaping the second feather and redrawn the quill into the center. the edges are less than the .5 level after beveling them.
Moving to the feather left of the first feather, I repeat the process done with the feather on the right. Moving from a level .5 to a level 2.
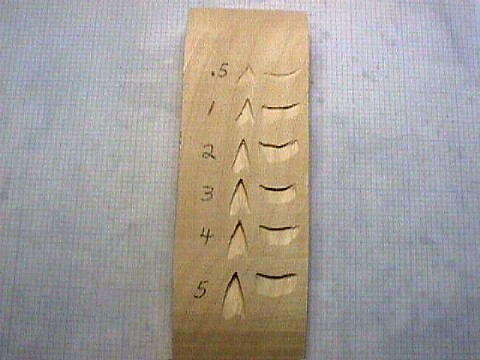
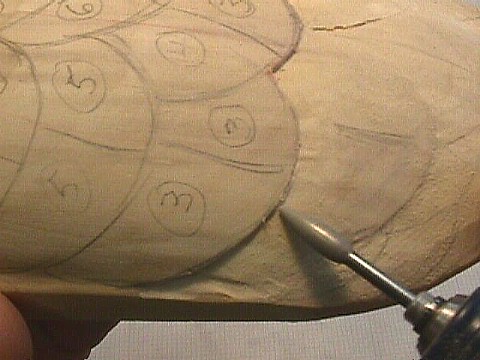
Cutting in or "punching in " the corners of a feather is an integral part of carving or "relieving" feathers on the wildfowl carving. The Sample Board in image 26b shows some "punched in" depths and edge cuts to give you some perspective on the depth of the numbers refered to in image 26a
Use the flattened point ro edge the margins in an even manner as shown here.
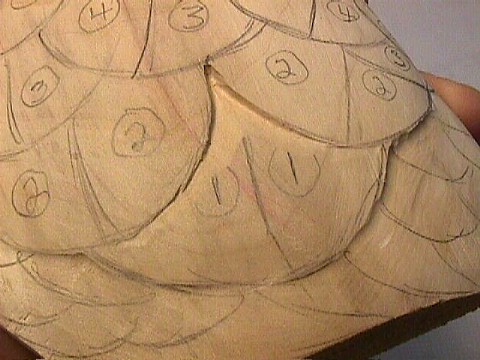
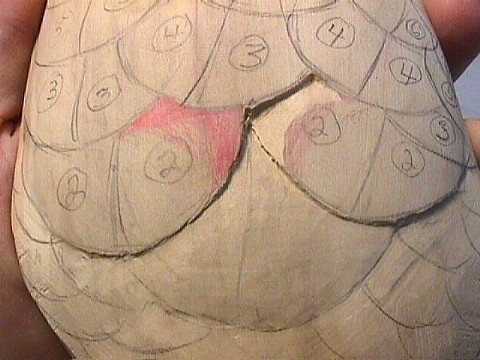
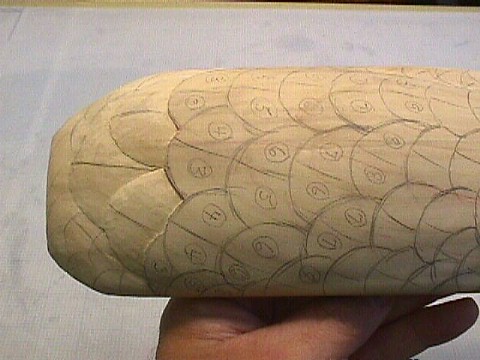
This image starts to show the effect of carving depth with just three feathers carved in.
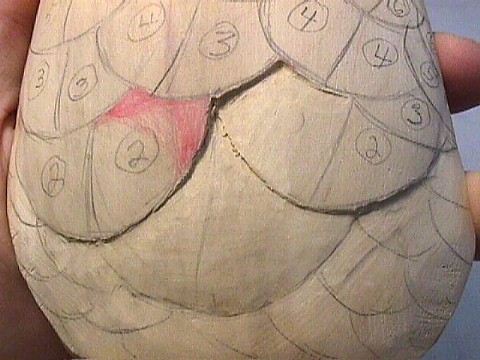
Again this is an image that shows the blending of the cut into the remaining feather surface.
Here I have moved right to step down the other half of that feather a level of 2 to 1 as I shape the other half of the feather.
I repeat the process on the left adjacent feather. Notice how I brought the surface down very close to the lower feather.
Using the same bit, "punch in " to level 2 here as in image 25.
Do not undercut the margin of the next feather in doing this step.
This image simply shows the blending of the cut into the rest of the feather surface.
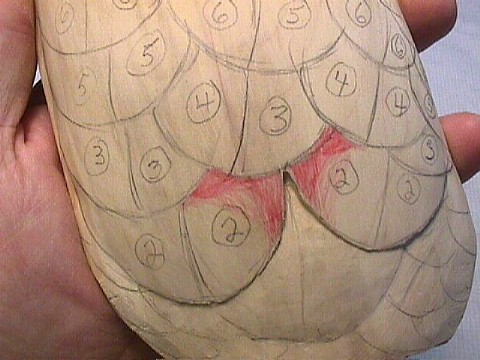
I have colored in red the next areas to "punch in". Notice that I am following proper sequence with the numbering as well.
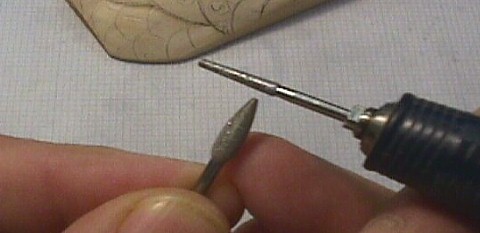
We modify the bit by flattening the tip with another diamond bit as shown in this image, 22b
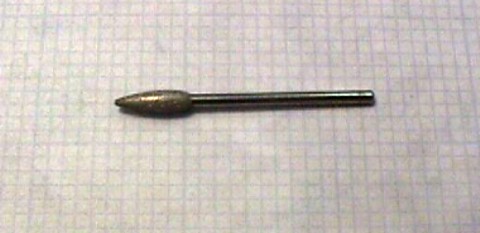
This is how the "Brunet Flame" diamond bit appears after it has been modified.
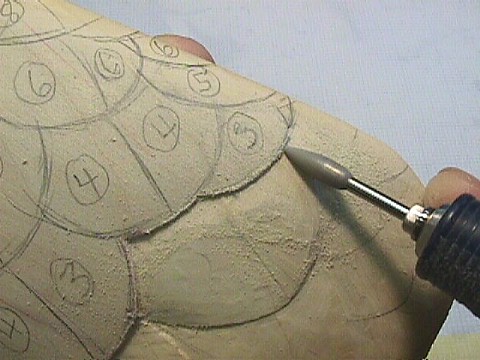
In the corner we "punch in" some depth (level 3) to get our start for the first feather.
Step around the left margin of adjacent feather.
Decreasing from Level 3 to level .5
Cut a similar step along the margin of the feather on the right. Notice the gradual change of depth.
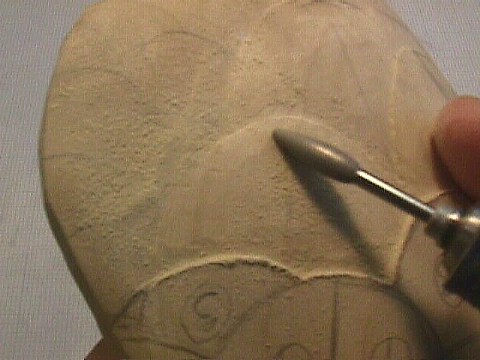
Running the speed of your machine at around 15,000 rpm blend the feather shape in convex manner shown here. Bit is half out.
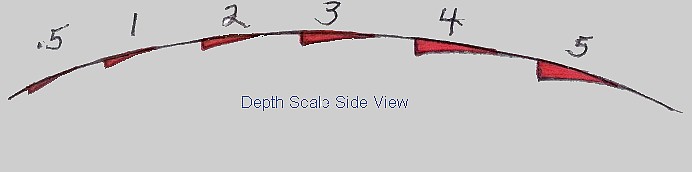
The scale below is the side view showing relative depths from shallow #.5 to deep #5. I will refer to these depth numbers as we carve in feathers.
Click to enlarge image.
This is a basic technique you can use to carve all contour feathers.
In the online instruction program, I show how to set up bunches of feathers using landscaping.
This process plus the softening of the feather edges makes the surface of the bird look much softer.