Roll up swiss sandpaper tightly for focusing sanding strokes, using the roll like a knife or rasp to enhance shapes.
Click on Images to Enlarge
Click on Images to Enlarge
Click on Images to Enlarge
Visual Tip # 2
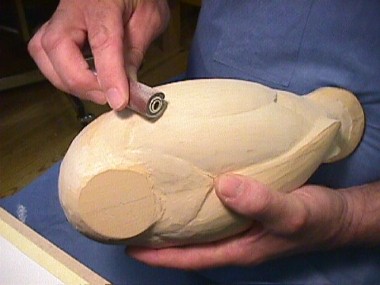
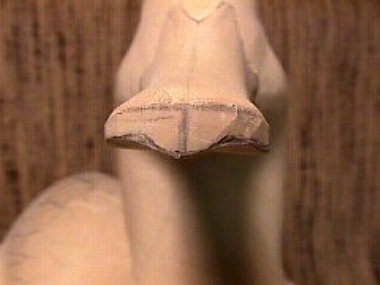
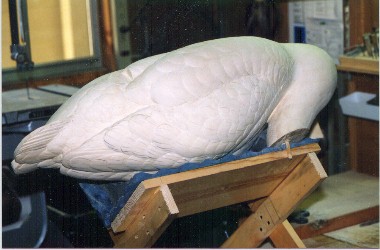
I draw the shape of the end of the bill onto a vertical flat plane there and shape the front view as shown before I round down the top of the bill and the mandibular ridges along the side.
Visual Tip # 3
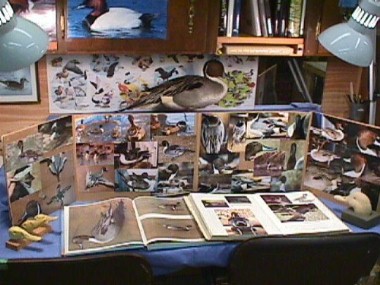
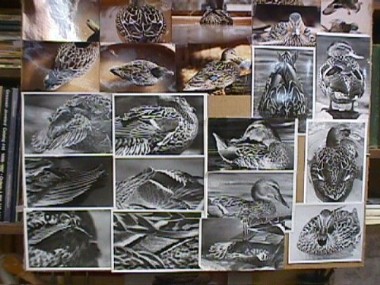
Before even drawing your pattern for a wildfowl carving you should gather all the reference material you can get your hands on.
Visual Tip # 4
Some ways to store your bits to have quick access during carving sessions. I like the "Lazy Susan" type for my most frequently used bits. Make your own to have all your bits organized.
Saves carving time.
Visual Tip # 5
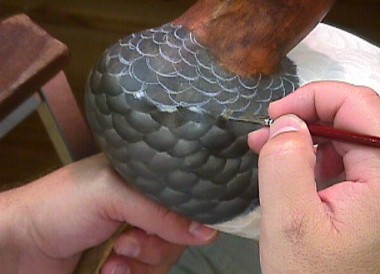
Paint what appears to be a black group of feathers, a charcoal grey as a base coat. Draw feathers with a water soluble pencil. Create depth with a lighter value from the feather base blended into an even darker edging. All of this gives depth. As you put in darker barbs around the edges and the splits, the feather becomes less deep but more soft and realistic.
Visual Tip # 6
There are many brush racks out there but one of my favorites is one you can make youself with a plastic sheetrock mud tray and a few bags of dried navy beans.
Visual Tip # 7
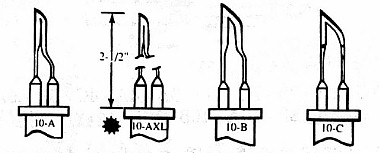
These are the four burning Detail Master handpiece tips I use almost exclusively for burning texture into my birds. No need to have dozens of tip styles and shapes. Keep it simple and learn to use these four very well.
Visual Tip # 8
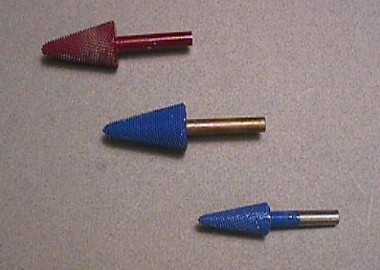
These three shapes and sizes of the new Foredom Typhoon bits take care of most waterfowl bulk wood removal and roughout requirements with minimal clogging. Use with softer woods such as Tupelo or Basswood.
Visual Tip # 9
In rounding a bird's body, divide the cutout into eighths and use high point lines visualized from the real bird to determine the shapes of areas in relation to these eighths. Remove wood by these increments to help maintain good symmetry and shape. Above all, go slow.
Visual Tip # 10
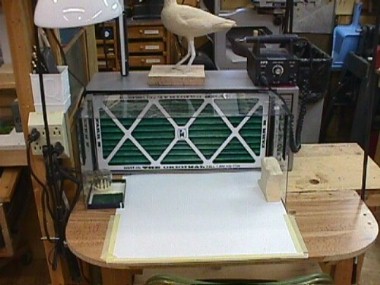
The DC 725 portable dust collector makes a great indoor permanent carving station. Powerful and removes most of the dust without taking out all of your heat or cooling.
Visual Tip # 11
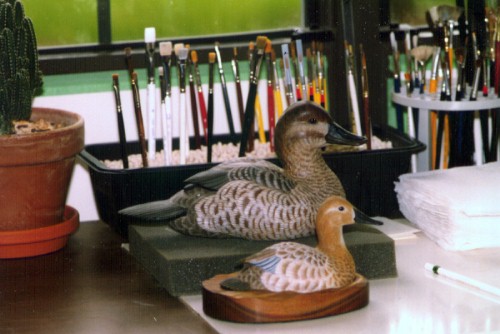
Make a simple cradle and pad with hard foam rubber for holding large and heavy waterfowl carving. This makes it easy to rotate your work as you carve in detail.
Click on Images to Enlarge
Visual Tip #12
For each species you carve, create a photo study board of all the best photos that will help you in any way with that carving.
This page will be a place for things I run across in my carving and teaching that I feel would assist the beginner.
I keep my digital camera by my side in the shop just for such purposes.